
Where to Place Mouse Traps: Best Locations
Learn how to use physical evidence—not guesswork—to place mouse-sized snap traps in a perpendicular T along active wall routes, protect children and pets, and monitor results daily.
Direct Answer: Where to Place Mouse Traps (CDC Standard)
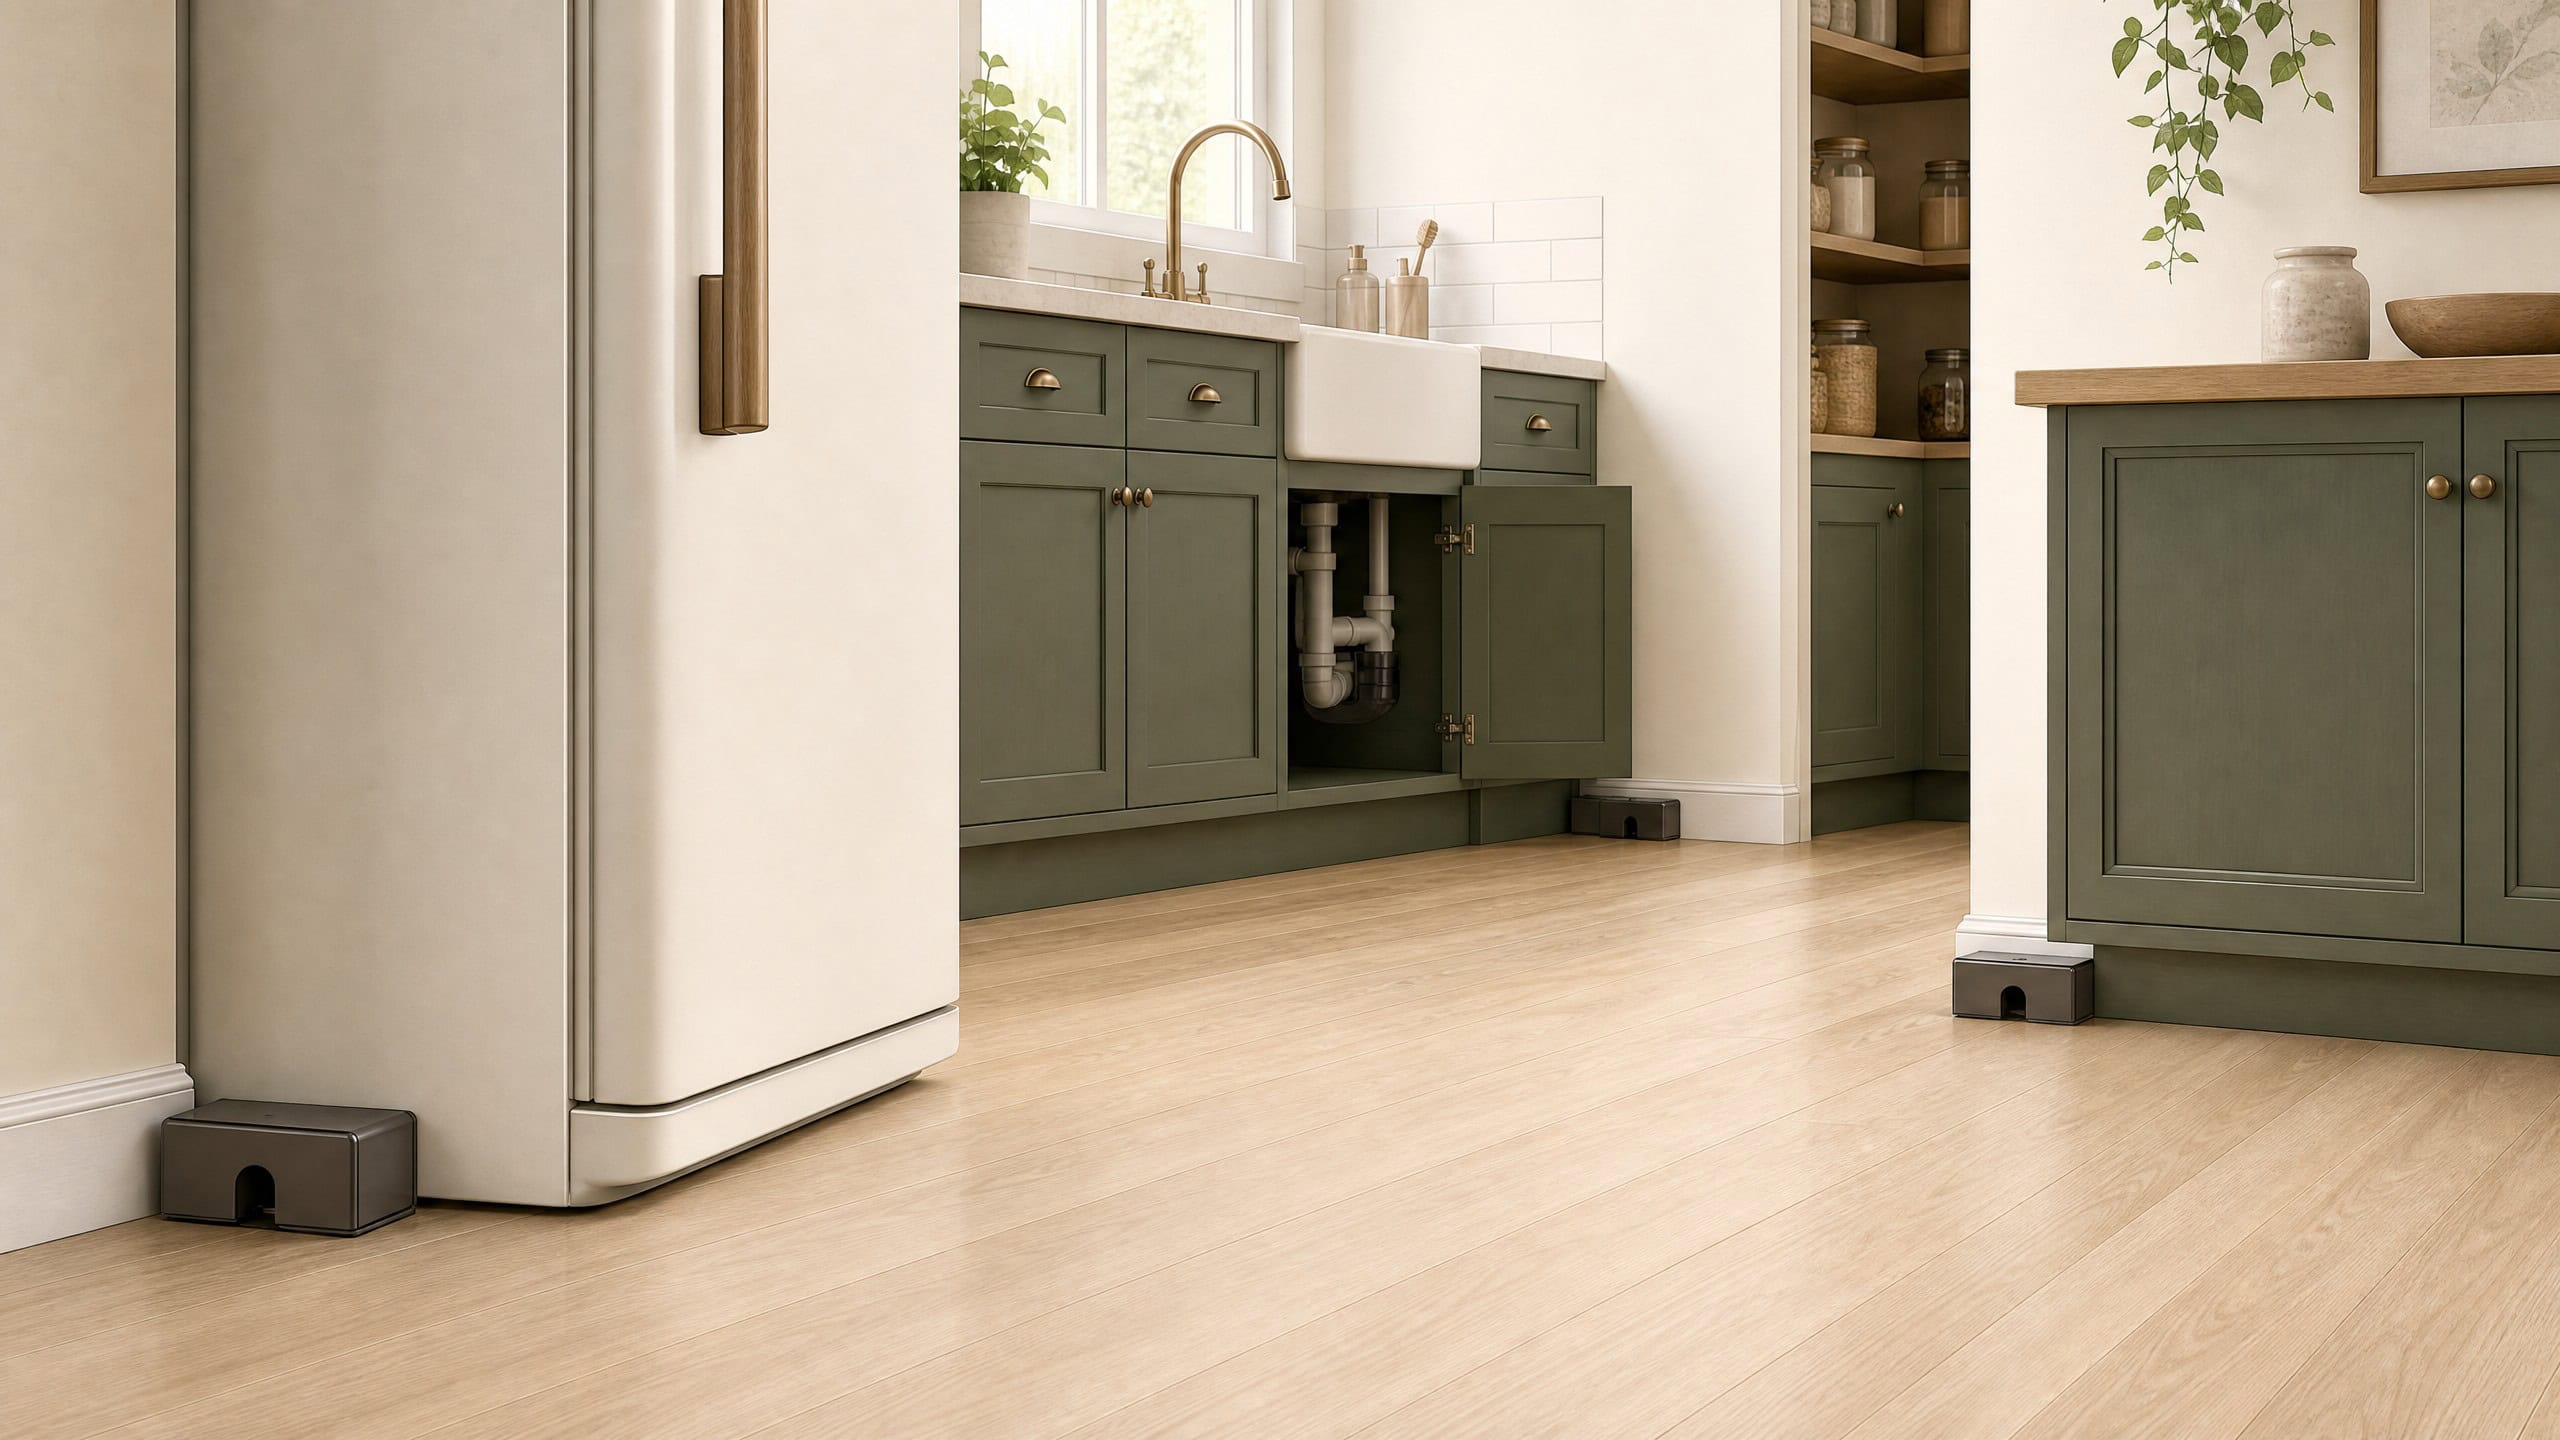
Place mouse-sized snap traps along confirmed wall-edge travel routes—behind stoves and refrigerators, inside under-sink cabinets, along pantry baseboards, and near garage door corners—never in the open center of a room. Put a small (pea-sized) amount of chunky peanut butter on the bait pan, set the trap against the wall, and position the baited end flush against the baseboard so the trap forms a T (CDC Trap Up). Check traps daily. The CDC advises against glue traps and live traps because caught, stressed rodents may urinate and increase disease exposure. Keep all traps and bait out of reach of children and pets—no trap is automatically pet-safe.
papalex-20 at no extra cost to you.
In This Trap Placement Guide:
- Start With Inspection: Why Route Beats Trap Price
- Interactive Room-by-Room Trap Placement & Spacing Planner
- 7 High-Probability Locations to Assess (Placement Matrix)
- Perpendicular T-Placement Geometry & Double-Set Technique
- Room-by-Room Placement Logic: Kitchen, Garage, Living Areas
- Video Guide: Where to Place Mouse Traps at Home
- How to Interpret Trap Results & When to Move a Trap
- What to Do After a Catch (CDC Wet Cleanup & 7-Day Checkpoint)
- Trap & Placement Supplies — Check Labels
- Frequently Asked Questions
Start With Inspection: Why Route Beats Trap Price
Traps work only when they intercept an existing mouse runway. House mice have poor distance vision and navigate primarily by keeping their whiskers in contact with vertical walls, cabinet kickplates, and appliance sides (a behavior called thigmotaxis). Before setting a single device, inspect with a flashlight for:
- Fresh droppings (3–6 mm dark, rice-shaped pellets): Concentrations behind appliances or inside lower cabinets mark active feeding and travel zones. Compare lookalikes in our mouse droppings visual ID guide.
- Sebum rub marks & gnaw shavings: Oily dark smudges along baseboards or pipe cutouts show where mice squeeze through repeatedly.
- Plumbing & utility penetrations: Unsealed gaps 1/4 inch or larger behind the stove, dishwasher, or under-sink drain connect wall voids directly to living spaces. See our signs of mice infestation checklist.
7 High-Probability Locations to Assess (Placement Matrix)
Use this room-by-room matrix to match your physical evidence to the safest, highest-probability trap placement:
| Location | Why Mice Travel Here | Placement & Safety Check |
|---|---|---|
| 1. Behind Refrigerator or Stove | Compressor warmth, hidden wall edges, crumbs, and gas/electric conduit openings. | Set perpendicular to the back wall with the baited pedal touching the baseboard; ensure cords are not pinched and you can pull the appliance or reach safely to check daily. |
| 2. Under Kitchen or Bathroom Sink | Oversized drain and supply pipe cutouts connect cabinet bases directly to wall voids. | Place trap in a T against the cabinet back wall near evidence on an accessible wall edge; secure cabinet doors with child locks if children or pets live in the home. |
| 3. Along Pantry Baseboards & Lower Shelves | Primary foraging corridor for grains, cereal boxes, and pet kibble. | Transfer all open food into hard glass or metal containers first, wet-clean any droppings, and set traps along the floor-to-wall edge—never on food-prep surfaces. |
| 4. Garage Door Corners & Wall Perimeter | Worn weatherstripping at the bottom corners of overhead doors can be an exterior entry point. | Place pairs of snap traps along the interior wall near confirmed activity, clear of garage door tracks, shielded behind storage bins away from pets, kids, and vehicle tires. |
| 5. Utility Room / Water Heater / Laundry | Warmth and unsealed dryer-vent, refrigerant, or plumbing penetrations. | Set traps along the perimeter wall next to utility chases; keep clear of standing water, gas burners, and lint traps. |
| 6. Accessible Attic Hatch or Basement Sill Plate | Framing sill plates and joist ledges act as elevated highways between floors. | Place only on stable, reachable framing ledges near the hatch where you can inspect daily without climbing into contaminated insulation. |
| 7. Behind Living-Area Furniture on Exterior Walls | Sofas and bookcases pushed near walls create dark, covered travel tunnels. | Only place behind furniture if children and pets are completely blocked from reaching behind the piece; otherwise use a locked room or enclosed station. |
Perpendicular T-Placement Geometry & Double-Set Technique
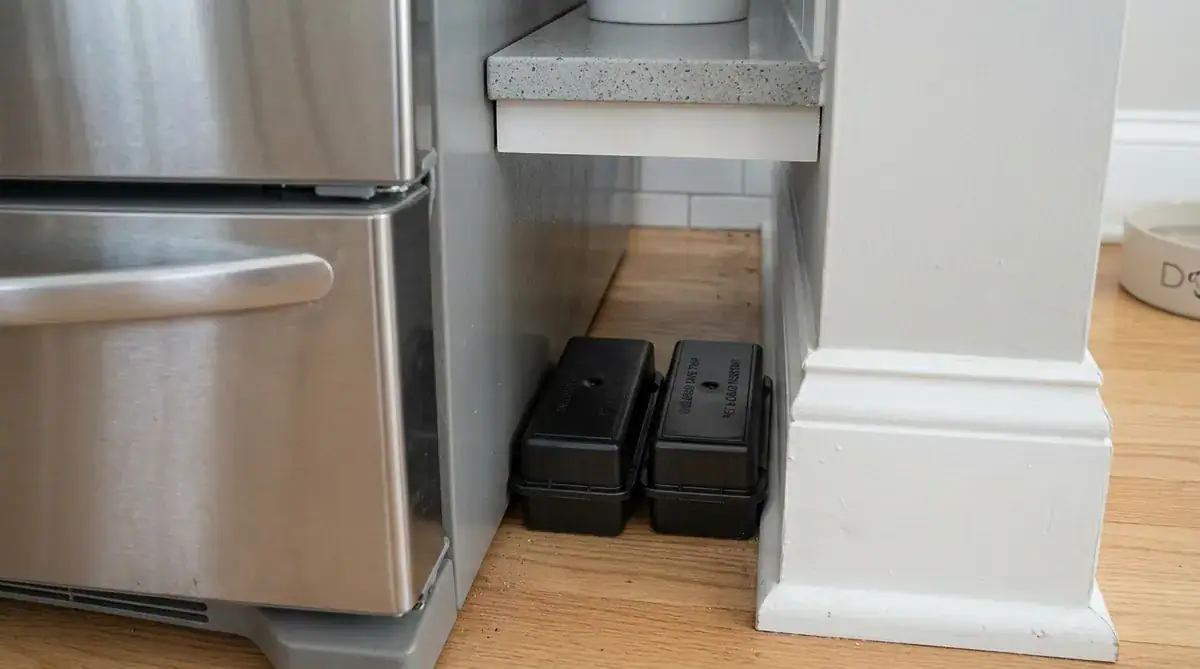
How you orient a snap trap against the wall matters just as much as which room you choose. Follow these four rules from CDC Trap Up and UC IPM:
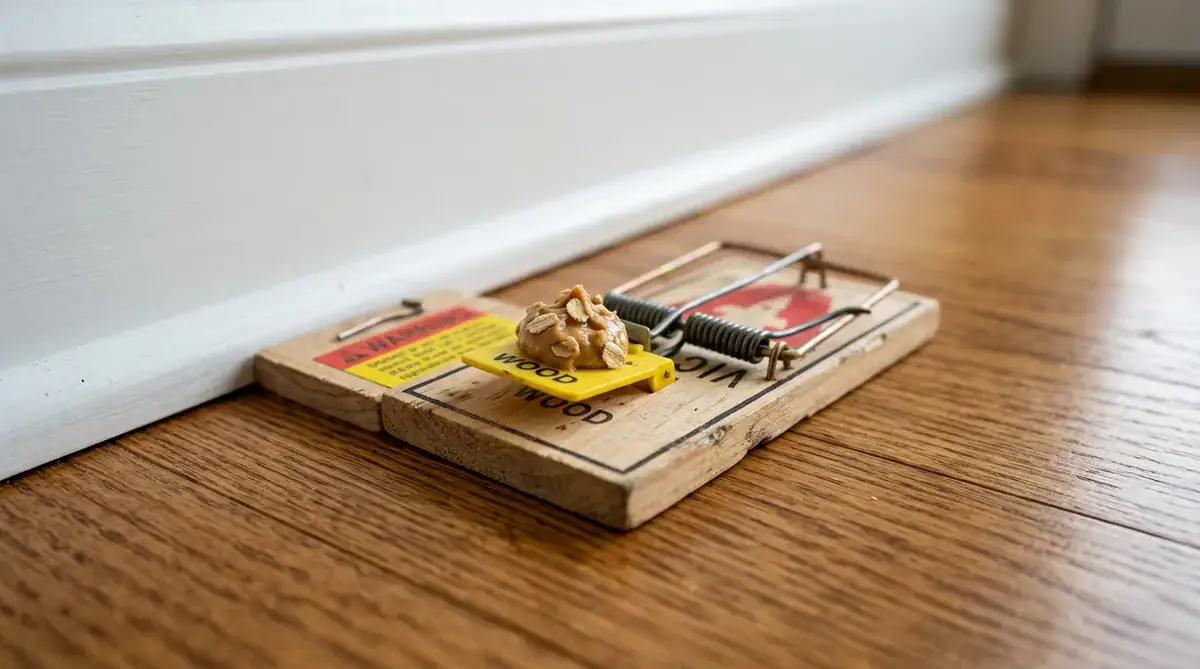
- Form a 90-Degree “T” Against the Wall: Do not place snap traps parallel to the baseboard with the spring end blocking the mouse’s path. Set the trap at a 90-degree angle to the wall with the baited trigger pan touching the baseboard so the trap and wall form the letter T. A mouse running from either direction along the wall steps directly onto the bait pan.
- Use a Pea-Sized Dab of Chunky Peanut Butter: Press a tiny amount of chunky peanut butter firmly into the bait cup or curl of the trigger pedal. Oversized mounds of bait allow mice to lick food off the edge without tripping the spring. See our best bait for mouse traps guide.
- Space Traps No More Than 10 Feet Apart: House mice have compact territories—often traveling only 10 to 30 feet from their nest to food. UC IPM recommends spacing snap traps no more than 10 feet apart (; pairs 1–2 inches apart may be useful).
- Use Double Sets for Trap-Shy Routes: Along fast runways (such as garage baseboards), place two snap traps side-by-side 1 to 2 inches apart in a parallel T-pair so a mouse attempting to hop over the first trap lands on the second.
Room-by-Room Placement Logic: Kitchen, Garage, Living Areas
Kitchen & Pantry
Prioritize the floor channel behind the refrigerator and stove, the back corners of the under-sink cabinet, and the baseboard inside the pantry. Never set a mouse trap on a kitchen counter, dining table, or exposed food-preparation surface. Before setting traps, lock all dry food and pet kibble inside airtight glass or metal containers and clean spills behind appliances so your baited trap is the only food reward available. See our full kitchen mouse prevention guide.
Garage, Basement & Utility Rooms
Focus on the transition line where the garage meets the house interior, both lower corners of the overhead garage door, sill plates along the basement foundation, and pipe chases near the water heater or furnace. Never place traps inside heating or cooling (HVAC) ducts. Keep garage placements shielded behind heavy bins so vehicles, pets, and wildlife cannot contact them.
Wall Voids, Attics & Apartments
If you hear scratching inside drywall at night, do not cut open the wall or toss poison inside. Trap mice where they exit the wall to forage: along adjacent room baseboards, under nearby sinks, and at accessible attic hatches. See how to get rid of mice in walls.
Video Guide: Where to Place Mouse Traps at Home
Watch this practical walkthrough on identifying baseboard runways and positioning mouse traps flush against walls for reliable capture:
How to Interpret Trap Results & When to Move a Trap
Check every deployed trap daily and keep a simple written log (location, date set, catches, and new droppings). Use this observation table before moving a trap:
| What You Observe | What It Means | Correct Next Action |
|---|---|---|
| Catch on Night 1 or 2 | Confirmed active runway; multiple mice often share the same route. | Disinfect and dispose safely wearing gloves, then immediately re-set a trap on the exact same spot. |
| Bait Stolen, Trap Not Sprung | Possible causes include excess bait, trigger sensitivity, or non-target activity; inspect rather than assume. | Reduce chunky peanut butter to a tiny smear inside the bait pan and verify T-alignment against the wall. |
| Trap Untouched for 4–5 Days, Fresh Droppings Nearby | Possible causes include placement, competing food, or misidentified evidence; inspect and confirm the route. | Eliminate competing food, shift the trap 3–5 feet to the fresh droppings edge, or pre-bait an unset trap for 24 hours. |
| 7 Full Days With Zero Catches & Zero New Signs | You have reached the 7-day monitoring checkpoint for that route. | Proceed to permanent gap sealing with copper mesh and caulk (mouse proofing hub); keep monitoring monthly. |
What to Do After a Catch (CDC Wet Cleanup & 7-Day Checkpoint)
CDC Post-Capture & Wet-Cleanup Protocol
- Do not vacuum or sweep droppings, urine, or nests dry. For an enclosed space, open doors and windows for 30 minutes before cleaning.
- Wear rubber or plastic gloves. Never handle a dead mouse or sprung trap with bare hands. (A respirator, coveralls, and goggles are for heavy infestation cleanup, not routine household trap checks.)
- Disinfect and soak for 5 minutes: Spray the dead rodent, trap, and any surrounding droppings with a household product whose label says “disinfectant,” or a fresh mix of 1.5 cups household bleach in 1 gallon of water (1 part bleach to 9 parts water). Let soak for 5 minutes (or the disinfectant label contact time).
- Double-bag and use a covered bin: Wipe up waste with paper towels, double-bag the rodent/trap in plastic bags, and place in a covered trash bin that is regularly emptied. Wash gloved hands, remove gloves, and wash bare hands with soap and water. See how to clean up mouse droppings safely.
- 7-day monitoring checkpoint: Keep trapping and inspecting until a full week passes with no catches and no new signs—and remember that a quiet week is a monitoring checkpoint, not proof mice cannot return if exterior or utility gaps stay open.
Placement Hardware · Check Specifications
Snap Traps, Exclusion Mesh & Cleanup Gear
Match your hardware to the stage of your removal plan: trap active wall routes first, handle catches with disposable gloves, and seal the entry holes once activity stops.
Affiliate disclosure: As an Amazon Associate, Mice Gone Guide earns from qualifying purchases (`?tag=papalex-20`) at no extra cost to you.

Victor M156-20 Mouse-Sized Wooden Snap Traps (20-Pack)
Classic mouse-sized wooden snap traps with a metal bait pedal—ideal for placing multiple perpendicular T-sets behind stoves, refrigerators, and garage perimeters.
Safety limit: Keep completely out of reach of children and pets. Never set open snap traps in exposed walkways or accessible floor areas. Check daily.
Check options on Amazon →
Xcluder Stainless-Steel & Poly Fiber Fill Fabric Kit
Rustproof stainless-steel mesh roll for packing 1/4-inch plumbing cutouts under kitchen sinks and behind appliances after trapping reaches the 7-day quiet checkpoint.
Check first: Wear gloves when cutting mesh and seal edges with elastomeric caulk—never rely on expanding foam alone.
Check options on Amazon →
Heavy-Duty Disposable Nitrile Cleanup Gloves
Essential hand protection when baiting traps, removing sprung traps, and performing the 5-minute CDC wet-disinfection sequence on droppings.
Safety limit: Dispose of single-use gloves after cleanup and wash bare hands thoroughly with soap and water.
Check options on Amazon →Compare trap types: Best Mouse Traps for Homes: Snap, Enclosed & Safety Limits →
Complete removal checklist: Mouse Removal Checklist: Traps, Cleanup, and Sealing → · How to Get Rid of Mice (Home Plan) →
Frequently Asked Questions
Where should I put mouse traps first?
Start along confirmed wall-edge routes where you see fresh droppings or rub marks: behind the refrigerator and stove, inside the under-sink cabinet near pipe cutouts, along pantry baseboards, and inside garage door corners. Set each mouse-sized snap trap perpendicular to the wall with the chunky-peanut-butter bait pan touching the baseboard so it forms a T.
How far apart should mouse traps be placed?
UC IPM advises spacing mouse traps no more than about 10 feet apart in areas where house-mouse activity is confirmed; pairs of traps 1 to 2 inches apart may improve capture on active routes.
Should a mouse trap be placed in the middle of a room?
No. Mice navigate by keeping their whiskers against vertical walls and concealed edges and rarely cross open floor space. Placing traps in the center of a room misses the runway and increases accidental contact risks for children and pets.
Why does the CDC say not to use glue traps or live traps?
According to CDC Trap Up guidance, glue traps and live-catch traps are not recommended because caught, frightened rodents can urinate and increase your risk of exposure to rodent-borne diseases.