
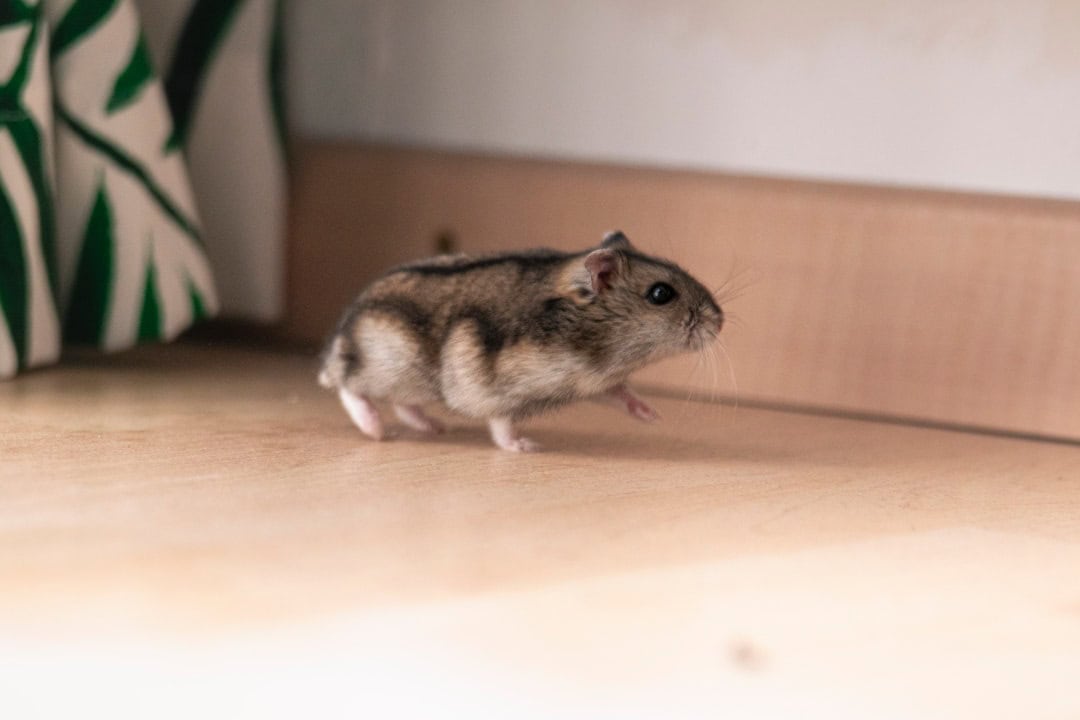
Start here for mouse removal


Choose your next step
| If you see… | Start here | Then do this |
|---|---|---|
| Droppings, gnaw marks, or food damage | Signs of mice infestation | Map activity before cleaning or buying traps. |
| Repeated signs in living areas | Complete mouse removal guide | Trap active runways, clean safely, and seal. |
| Droppings or urine marks | Safe droppings cleanup | Wet, wait, wipe, bag, and disinfect. |
| Gaps around pipes, doors, garage, siding | Entry-point sealing checklist | Use mesh, metal, mortar, flashing, or sealant. |
| Apartment mouse activity | Apartment mouse plan | Document signs and coordinate with management. |
What this hub replaces
Weak mouse pages often scatter readers into unrelated archives, remedy posts, and product boxes. This hub keeps the sequence clean: diagnose, control, clean, seal, monitor, and only then choose tools that match the task.
Situation guides
Active mice tonight
Use traps along wall routes, remove food, and keep contaminated areas undisturbed until you can clean them safely.
Mice in walls
Do not cut holes blindly. Confirm routes, trap accessible exits, and escalate for dead odor or inaccessible nests.
Mice in apartment
Document evidence, notify management, trap safely in your unit, and request shared-wall or utility-chase repairs.
After cleanup
Use the cleanup as a checkpoint. If new droppings appear, the entry route or food source is still active.
Helpful products only after diagnosis

Victor M156-20 Metal Pedal Wooden Mouse Traps, 20 Pack
Best for: placing several traps along walls, appliances, pantry routes, and garage edges.
Avoid if: homes where children or pets can reach open snap traps.
Use note: Use several traps at once and place them perpendicular to the wall with the trigger facing the wall.
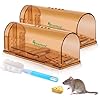
CaptSure 2-Pack Humane Mouse Traps
Best for: light activity in pantries, garages, and utility zones when you can inspect often.
Avoid if: large infestations or homes where live traps will be forgotten.
Use note: Pair with sealing and sanitation or replacement mice may continue entering.

Xcluder Rodent Control Fill Fabric DIY Kit
Best for: pipe penetrations, utility openings, siding transitions, and small gnaw-prone gaps.
Avoid if: large holes that need hardware cloth, metal flashing, mortar, or structural repair.
Use note: Wear gloves and pair with the correct sealant or repair material for the surface.
Internal link plan for this hub
| Anchor | Target | Purpose |
| confirm signs of mice before buying traps | /signs-of-mice-infestation/ | Diagnosis |
| remove active mice safely | /how-to-get-rid-of-mice/ | Main pillar |
| clean mouse droppings safely | /how-to-remove-mice-droppings-safely/ | Safety |
| seal entry points after activity drops | /seal-home-from-mice/ | Prevention |
FAQ
Should I start with traps or sealing?
Start with evidence. If mice are active inside, begin trapping and food control while preparing staged sealing. Avoid trapping live mice inside inaccessible voids.
Can this hub rank separately from the main guide?
Yes. The hub should rank for broad navigation intent while the main guide ranks for the full how-to process.
Where should product boxes go?
Below the decision table and explanatory content, after the reader knows whether they need traps, PPE, or sealing materials.
Complete coverage for this situation
This guide focuses on mouse removal in the way people actually need it at home. The goal is to answer the practical questions that come up at home: what to check first, what is safe, what to avoid, which tools fit the situation, and when to call a professional.
This guide covers the practical details a reader needs: mouse removal hub, active mouse signs, droppings cleanup, trap placement, bait safety, entry-point sealing, prevention, and monitoring. They are explained in plain language through definitions, checklists, tables, product notes, and frequently asked questions.
What this guide helps you avoid
Mouse-control advice about mouse removal often has four weaknesses. First, many pages answer the easy part but do not explain the sequence. Second, many pages talk about products before the reader understands the problem. Third, safety warnings are often buried after the advice. Fourth, internal links are often generic, which weakens the route from diagnosis to removal, cleanup, exclusion, and prevention.
This guide solves those problems for a visitor who does not know whether to start with signs, traps, cleanup, sealing, or professional help. It gives a concise answer near the top, then moves into a decision framework, practical room-by-room examples, mistakes, limitations, products, internal links, FAQ answers, and source-backed safety notes. That structure helps the page satisfy broad informational intent while still creating a legitimate path to affiliate revenue when the reader is ready for tools.
| Common weak advice | Fix added in this guide | Why it matters |
|---|---|---|
| Advice starts with products or generic tips. | Start with the exact problem, safety constraint, and first action. | Readers trust pages that solve the situation before selling a product. |
| Pages mention traps, repellents, or sealants without explaining when each fits. | Add a comparison framework and best-for/avoid-if guidance. | This reduces wrong purchases and improves conversion quality. |
| Pages omit cleanup, food control, or exclusion. | Connect the topic to the full mouse-control sequence. | Topical authority improves when every page reinforces the whole system. |
| Answers are long but not extractable. | Use short answer paragraphs, definitions, tables, FAQs, and clear headings. | Readers need clear steps they can follow without guessing. |
Definition: what this page means by mouse removal hub architecture
In this guide, mouse removal hub architecture means a practical, safety-first process that uses evidence from the home instead of guesses. The central principle is simple: route the reader to the correct next page instead of making them scroll through generic advice or shop too early. That is why the article avoids one-product miracle claims and keeps scent tricks, poison, and random trap placement in perspective.
A mouse problem is rarely solved by one isolated action. Food access can keep activity going even when traps are present. Open gaps can restart the problem after cleanup. Dry cleanup can spread dust. Unchecked traps can create odor or suffering. Poorly placed products can expose children, pets, or non-target animals. A complete page must address these connections without making exaggerated promises.
Important terms and concepts
- mouse removal hub
- active mouse signs
- droppings cleanup
- trap placement
- bait safety
- entry-point sealing
- prevention
- monitoring
- escalation
- mouse elimination plan
These terms matter because they describe the real parts of the problem. A complete guide should show how signs, sanitation, trapping, cleanup, exclusion, prevention, and escalation fit together.
Room-by-room and situation-by-situation checklist
Mouse control becomes clearer when the reader stops thinking about the whole house at once and starts mapping active zones. The table below gives the practical interpretation for the locations most likely to matter for this topic.
| Area or situation | What to check | How to use the finding |
|---|---|---|
| start-here page | Inspect for droppings, rub marks, gaps, food access, or activity edges before choosing a product. | Use this area to confirm whether the issue is active mice, contamination, or re-entry. |
| signs page | Inspect for droppings, rub marks, gaps, food access, or activity edges before choosing a product. | Use this area to confirm whether the issue is active mice, contamination, or re-entry. |
| cleanup page | Inspect for droppings, rub marks, gaps, food access, or activity edges before choosing a product. | Use this area to confirm whether the issue is active mice, contamination, or re-entry. |
| trap guide | Inspect for droppings, rub marks, gaps, food access, or activity edges before choosing a product. | Use this area to confirm whether the issue is active mice, contamination, or re-entry. |
| apartment guide | Inspect for droppings, rub marks, gaps, food access, or activity edges before choosing a product. | Use this area to confirm whether the issue is active mice, contamination, or re-entry. |
| garage guide | Inspect for droppings, rub marks, gaps, food access, or activity edges before choosing a product. | Use this area to confirm whether the issue is active mice, contamination, or re-entry. |
| seal-home guide | Inspect for droppings, rub marks, gaps, food access, or activity edges before choosing a product. | Use this area to confirm whether the issue is active mice, contamination, or re-entry. |
| proofing materials guide | Inspect for droppings, rub marks, gaps, food access, or activity edges before choosing a product. | Use this area to confirm whether the issue is active mice, contamination, or re-entry. |
Do not clean away every sign before you understand where the activity is concentrated. Fresh droppings, gnaw marks, and rub marks are unpleasant, but they are also evidence. Once documented, cleanup should follow a wet, contained process, especially around food-contact surfaces, children, pets, or stored items.
Step-by-step decision framework
Step 1: Identify the real problem type
Decide whether the reader is dealing with active mice, leftover contamination, open entry points, repeated re-entry, or a product-choice question. A page about mouse removal should not treat all of those as the same problem. Active mouse signs call for trapping and food control. Contamination calls for wet cleanup. Re-entry calls for exclusion. Buyer intent calls for a product comparison after the safety sequence is clear.
Step 2: Protect people, pets, and food first
Before using any product, move food into rigid containers, keep children and pets out of contaminated areas, and avoid disturbing droppings or nesting material dry. If bait, disinfectant, sealant, or trap products are used, the label matters more than any blog post. This is especially important in kitchens, apartments, garages, and homes with pets.
Step 3: Treat the active route, not the whole house randomly
Mouse activity often follows edges: baseboards, cabinet backs, utility lines, garage walls, appliance gaps, and warm hidden runs. Random trap placement or random repellent use wastes time. The best action is the one placed on the route mice are already using.
Step 4: Close the loop with cleanup and exclusion
Cleanup without removal leaves new droppings. Trapping without exclusion can become a cycle. Exclusion without monitoring can trap activity inside. The complete loop is evidence, food control, trapping, wet cleanup, sealing, and monitoring.
Step 5: Escalate when the risk is bigger than DIY
Professional help is appropriate when activity repeats after correct DIY steps, when droppings are widespread, when wall or attic voids are involved, when insulation or HVAC areas are contaminated, or when health-risk occupants are present. This guide keeps this escalation point clear so the page does not overpromise DIY outcomes.
Best for / avoid if guidance
| Option | Best for | Avoid if | Important note |
|---|---|---|---|
| DIY inspection | Small, visible, recent activity with clear evidence. | You cannot safely access the area, or contamination is heavy. | Photograph evidence before cleanup or sealing. |
| Traps | Active runways where placement can be controlled and checked daily. | Children, pets, or non-target animals can reach the device. | Use several properly placed traps rather than one trap in the open. |
| Live trapping | Light activity where traps can be checked very frequently. | You cannot inspect often or local release rules are unclear. | Live trapping still requires exclusion and sanitation. |
| Exclusion materials | Confirmed gaps, pipe penetrations, door bottoms, and utility routes. | The gap is an active vent, drain, combustion-air opening, or structural issue. | Do not block required ventilation or drainage. |
| Professional pest control | Repeated activity, heavy contamination, walls, attics, odors, or health concerns. | The issue is a single visible fresh sign that can be safely managed. | Ask what inspection, exclusion, cleanup, and monitoring are included. |
Product and tool guidance without over-selling
Affiliate CTAs work best when they appear after the reader understands the situation. For this page, the relevant product categories are:
- snap traps when the active route is known: useful only after the reader has matched the tool to the exact situation and checked the current product label or Amazon listing.
- N95 and nitrile gloves when cleanup is needed: useful only after the reader has matched the tool to the exact situation and checked the current product label or Amazon listing.
- door sweep or fill fabric when the entry point is known: useful only after the reader has matched the tool to the exact situation and checked the current product label or Amazon listing.
The guide avoids fake ratings, fake testing claims, fake before-and-after stories, and hardcoded prices. Product cards should explain what a tool is for, what it is not for, and what the reader must check before buying. This is better for users and safer for long-term trust because it aligns commercial content with actual search intent.
Internal links that strengthen the whole mouse-control cluster
| Contextual anchor text | Placement | Reason |
|---|---|---|
| how to get rid of mice safely | Use this link where the reader is ready for that next step. | It strengthens the topical path and keeps the reader inside the mouse-control cluster. |
| signs of mice infestation | Use this link where the reader is ready for that next step. | It strengthens the topical path and keeps the reader inside the mouse-control cluster. |
| safe droppings cleanup | Use this link where the reader is ready for that next step. | It strengthens the topical path and keeps the reader inside the mouse-control cluster. |
| best mouse-proofing materials | Use this link where the reader is ready for that next step. | It strengthens the topical path and keeps the reader inside the mouse-control cluster. |
The internal-link plan is deliberately sequential. Diagnostic pages should send readers to removal and cleanup. Removal pages should send readers to cleanup, sealing, and tools. Buyer pages should send readers back to safety and placement guidance. That pattern builds topical authority while helping readers make the next safest decision.
How to make this page more useful than a generic pest-control article
The page should sound like it was written for a real person standing in a real room, not for a spreadsheet of keywords. That means using examples such as a line of droppings under a sink, scratching behind a stove, shredded paper in a garage cabinet, food damage in a pantry, or a low gap under an exterior door. These examples help readers connect the advice to their home and help readers understand that the page covers practical scenarios.
Strong pages also explain limits. If a scent product only masks an odor, say so. If a trap needs daily checks, say so. If a gap involves gas, electrical, HVAC, or drainage, tell the reader to use a qualified professional. If contamination is heavy, avoid making it sound like a quick housekeeping chore. Honest limits create trust and prevent affiliate content from looking thin or exaggerated.
Use this checklist while inspecting on your phone
- Take photos of droppings, gnaw marks, rub marks, nesting material, and possible entry holes before cleaning.
- Keep children and pets away from contaminated or trapped areas.
- Work from the strongest evidence first instead of treating every room at random.
- Do not dry-sweep or dry-vacuum mouse droppings or nesting material.
- Use products only after matching them to the problem: active mice, cleanup, sealing, or prevention.
- Check traps and live-catch devices frequently and follow all product labels.
- Stop and call a qualified professional for heavy contamination, unsafe access, repeated activity, or health-risk situations.
More questions people ask
What should I do before buying anything for mouse removal?
Identify the problem type first. Look for fresh signs, active routes, contamination, likely entry gaps, and safety constraints. A product is only useful when it matches the situation. Buying traps, repellents, or sealants before this step often leads to wasted money and missed activity.
What is the most common reason DIY mouse control fails?
The most common failure is treating one symptom while leaving the rest of the system untouched. A trap can catch one mouse while food remains available. Cleanup can remove visible droppings while entry gaps remain open. Exclusion can fail if active mice are still inside. The fix is a sequence, not a single object.
How should this page be updated over time?
Update it when public-health cleanup guidance changes, pesticide or rodenticide label guidance changes, product listings change, or the site publishes a more specific supporting guide. Also update images and examples when better original inspection photos are available.
What should never be exaggerated on this page?
Do not claim guaranteed removal times, guaranteed product success, fake testing, fake ratings, fake case studies, or unverified health statistics. Use clear language about what each step can and cannot do.
Final safety checklist before you act
- Identify whether you are dealing with active mice, leftover contamination, open entry points, or a product-choice decision.
- Keep food, pet food, bird seed, and stored snacks in rigid sealed containers.
- Place traps only where activity is confirmed and where children and pets cannot reach them.
- Wet droppings and nesting material with disinfectant before removal.
- Use chew-resistant materials for entry points; foam alone is not a durable rodent barrier.
- Read every product label before use, especially around kitchens, pets, children, and contaminated spaces.
- Monitor for at least two quiet weeks after the last sign of activity.
Room-by-room examples that make the advice easier to use
A strong mouse removal planning plan becomes easier when you apply it to one room at a time. In a kitchen, focus on food packaging, under-sink pipe openings, dishwasher and stove gaps, toe kicks, pantry shelves, pet-food bowls, and the back edge of appliances. In a garage, check the bottom corners of overhead doors, weather stripping, storage boxes, bird seed, grass seed, tool benches, and the wall line where the slab meets framing. In a basement, inspect sill plates, utility penetrations, laundry lines, sump areas, stored paper, and cluttered edges. In an attic, look for safe access first; widespread droppings, urine odor, tunnels in insulation, or unknown wiring damage can be a professional inspection situation.
Use evidence before effort. A single old dropping in a box does not mean the same thing as fresh pellets along a baseboard every morning. Scratching behind a stove points to a different route than droppings near a garage door. Food damage in one cabinet deserves a different response than repeated noises in a ceiling void. The practical sequence stays the same: document, reduce food access, control active travel routes, clean safely, close entry points, and monitor.
Common questions before you start
Should I clean first or trap first?
Document the evidence first. Clean areas that create immediate exposure, especially food-preparation areas, but do not erase every clue before you know the route. If activity is fresh, combine safe cleanup with trapping and sealing rather than doing those steps in isolation.
How do I know whether the problem is solved?
Look for a quiet period with no new droppings, no fresh gnawing, no food damage, no scratching, and no trap activity. One quiet night is not enough. Keep monitoring for at least two quiet weeks after the last sign.
What should I avoid doing?
Avoid dry sweeping droppings, scattering traps randomly, relying on one scent product, sealing unknown routes too early, or using bait where children, pets, wildlife, or food areas could be put at risk. When contamination, access, or health risk is beyond ordinary DIY, use professional help.
Final recommendation
The best result comes from treating mouse removal as part of one connected home-control system, not as a single product purchase. The important details are choosing the right next step: signs, cleanup, trapping, sealing, prevention, or professional help. Start with the clearest evidence, act on the area with fresh activity, protect people and pets, and use tools only when they fit the situation. That approach is slower than a miracle promise, but it is safer, more complete, and more likely to keep the same mouse problem from returning.
Sources and review notes
This guide is written for ordinary homes and reviewed against public-health, pesticide-safety, and integrated pest management references. It is not medical, legal, or pesticide-label advice.
- CDC: How to clean up after rodents
- EPA: Safely use rodent bait products
- UC IPM: House mouse control and exclusion
Author/editorial note: Written by Alexios Papaioannou for Mice Gone Guide. Last reviewed May 31, 2026. Update when public-health cleanup guidance, pesticide labels, or exclusion best practices change.

Alexios Papaioannou is the founder and lead editor of Mice Gone Guide. He oversees research, article review, and content updates focused on mouse prevention, humane control, home proofing, and safety-first household guidance.