Mice problem action box

Need mice gone fast? Choose DIY control or professional help before activity spreads.

DIY trapping can work for light activity, but recurring droppings, attic noises, wall sounds, insulation contamination, or mice returning after sealing may require a professional inspection. Use the checklist below to act quickly and safely.

Shop enclosed trapsShop sealing materialsShop cleanup safety gearAsk about professional-help next steps

Disclosure: Some product links may be affiliate links. If you buy through them, we may earn a commission at no extra cost to you. For heavy contamination, illness risk, or unsafe areas, contact a qualified professional.

Mouse removal guide

How to Get Rid of Mice Safely: A Step-by-Step Home Removal Plan

A practical sequence for homeowners and renters: confirm activity, protect food, trap active routes, clean contamination safely, seal entry points, and know when the job has moved beyond DIY.

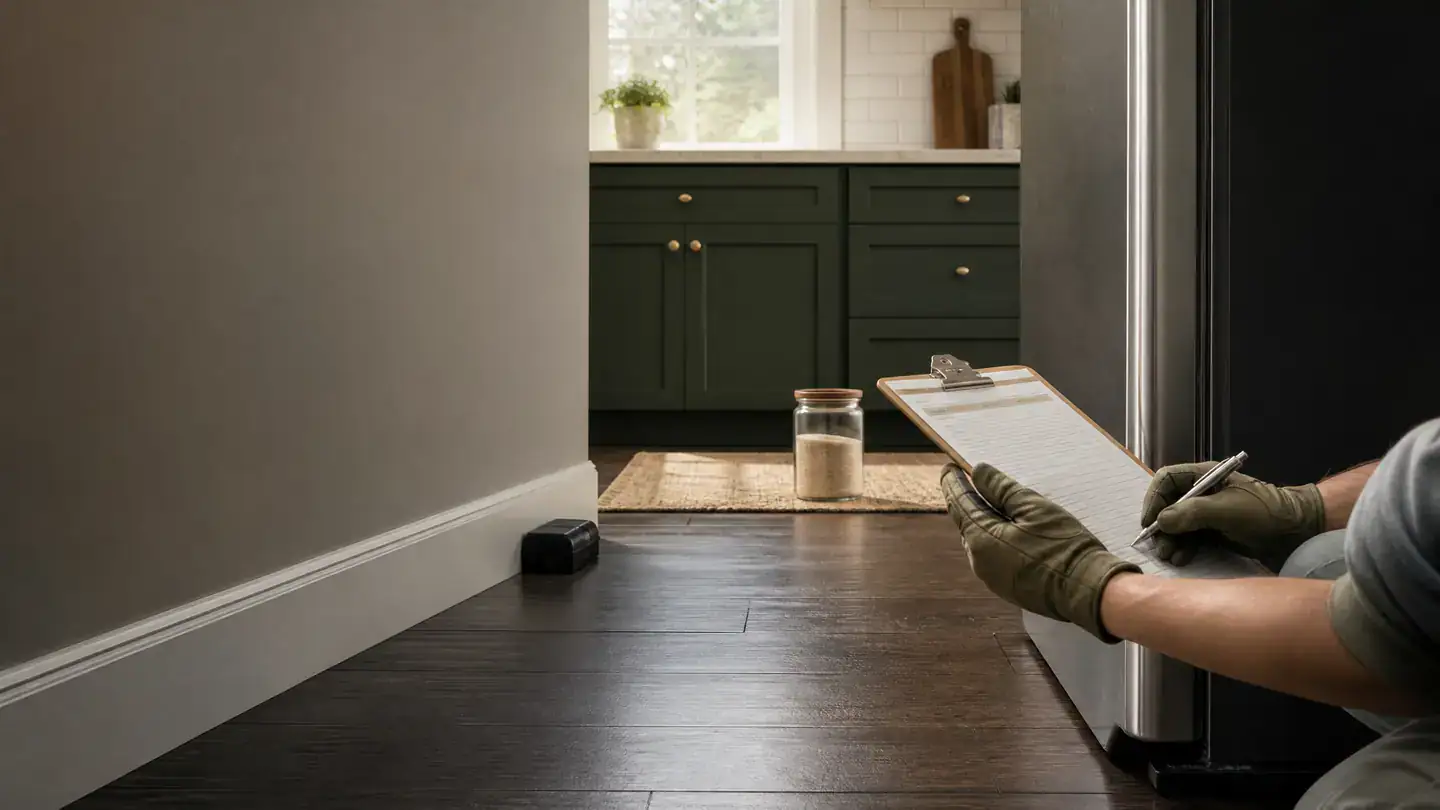
Safe mouse-removal inspection in a clean kitchen, showing a protected trap along a baseboard and a homeowner documenting the route.
Start with the evidence route, then match the next step to the condition you can actually see.

Direct answer

To get rid of mice safely, use a structured IPM sequence: remove food access, place snap or enclosed traps along active runways, wet-clean droppings with disinfectant (never dry vacuum), and seal entry gaps using copper mesh or steel wool.

Who this guide is for

Use this guide when you have found droppings, heard repeated scratching after dark, noticed gnawed food packaging, found shredded nesting material, or caught a mouse and want to stop a repeat problem. It is designed for ordinary homes, apartments, garages, and accessible storage areas. It is not a substitute for a pest-control inspection, product label, building-safety assessment, or medical care.

If you rent, the sequence is still useful, but the repair responsibility may be shared. Photograph the evidence, note the room and likely route, protect food, and notify the landlord or property manager promptly when gaps, shared walls, utility penetrations, or common areas are involved. Use the apartment-specific guide, how to get rid of mice in an apartment, for renter-safe documentation and access issues. Do not cut into walls, alter required building systems, or use unapproved bait in common areas.

Start with the mouse signs hub if you are not sure whether the evidence is fresh. Fresh signs and their location are more useful than a vague sense that “there might be mice.” They tell you whether the immediate priority is safe cleanup, trap placement, a gap repair, or a professional inspection.

What to do tonight if you need a calm first move

Do not begin by buying a random scent product or moving traps around the middle of every room. Take a few minutes to make the situation safer and more legible. Keep children and pets away from any contaminated area. Put exposed food, pet food, bird seed, and snacks into closed hard-sided containers. Take photos of droppings, chewed packaging, rub marks, nests, and possible gaps before you remove the evidence. If you can use traps safely, put them where activity is visible along protected edges—not in open traffic areas. Then plan the cleanup and repair steps for daylight.

A practical first-pass decision table
What you found Best first action Do not do first What comes next
Fresh droppings along a wall, cabinet edge, or behind an appliance Document the route and place protected traps along that edge. Do not sweep or vacuum the droppings while dry. Wet-clean the area, remove food access, and inspect nearby gaps.
One old-looking dropping with no other evidence Clean it safely, then monitor that exact spot. Do not assume an active infestation from one clue alone. Use the signs guide if additional evidence appears.
Chewed food packaging in a pantry Discard questionable food, move remaining food to rigid containers, and trap the cabinet-edge route. Do not leave replacement food in cardboard or thin bags. Inspect pipe and toe-kick gaps after activity is controlled.
Activity in an attic, wall void, HVAC area, or inaccessible utility space Document it and assess safe access; consider professional help early. Do not open walls, disturb insulation, or block vents blindly. Use a qualified inspection and a repair plan matched to the structure.

The 7-step mouse removal system

Step 1: Confirm the active zone and find evidence

Mice rarely use a room at random. They tend to travel edges and protected routes: baseboards, cabinet backs, appliance cavities, pipe penetrations, garage walls, shelving, attic transitions, and the edges of stored materials. Your job is to identify the strongest evidence before you disturb it. Look for droppings, gnawing, food damage, nesting material, rub marks, or repeated sound in the same location. Photograph what you find and write down the room, date, and exact position. That simple record prevents you from treating the whole house as one invisible problem.

Do not try to age droppings by crushing them or touching them. You do not need a perfect diagnosis before you act safely. You need enough evidence to choose a controlled next step. Repeated new droppings after cleanup, fresh damage, or recurring sounds near the same edge point to current activity. A single old sign may only call for safe cleaning and follow-up monitoring.

Inspect likely entry routes at the same time. CDC guidance notes that mice can get through openings about the width of a pencil—roughly 1/4 inch or 6 mm. Check under and behind kitchen cabinets, around plumbing, behind appliances, around doors and windows, in basement or crawl-space transitions, in the attic, and around electrical, water, gas, cable, and sewer lines. CDC seal-up guidance is a useful room-by-room inspection reference.

This step answers a common panic question: “Where are they coming from?” Often, the honest answer is that you do not know yet. A good plan does not invent certainty. It starts with evidence, narrows the active route, and then uses controlled trapping and exclusion to test whether the pattern stops.

Step 2: Remove food attractants and secure pantry goods

Sanitation does not replace trapping or exclusion when mice are active, but it makes every other step more effective. Move dry food, pet food, bird seed, snacks, and stored grains out of flimsy packaging and into containers with tight-fitting lids. Wipe crumbs from under and beside appliances. Wash dishes instead of leaving them overnight. Put pet-food bowls away after feeding when practical. Empty indoor trash regularly and use a container with a lid. These measures reduce easy rewards on the route you are trying to interrupt.

Also reduce convenient nesting material. Cardboard, paper, fabric scraps, insulation offcuts, and clutter near warm hidden edges can support activity. Do not drag suspicious cardboard through a clean living space. If a box is contaminated, evaluate whether it should be discarded outside according to local waste rules. For items you keep, handle the visible contamination with the wet cleanup method below before bringing them back into use.

Be realistic about water. A dripping pipe, a damp utility area, or an accessible pet-water bowl may contribute to repeat pressure, but fixing water alone will not remove an established mouse route. Think in layers: reduce rewards, control the active mice, then close the route that lets replacements enter.

Step 3: Deploy strategic snap traps along runways

For many small, accessible house-mouse problems, properly placed traps are a practical first control tool. UC IPM advises placing traps near evidence of activity, along walls, behind objects, and in dark corners. The key is placement and enough devices, not a single expensive item. Position traps where mice are already likely to pass: along a wall beside fresh droppings, behind a refrigerator or stove, under a sink near a pipe gap, at the back of a pantry shelf, or along a garage wall.

Use a trap type that matches access risk. Open snap traps can be effective in protected locations where children, pets, and non-target animals cannot reach them. Enclosed traps may better suit apartments, kitchens, and homes with pets when the design and location prevent access to the mechanism. Live-catch traps are not a low-effort option: they need frequent checks, humane handling, and attention to applicable local rules. Never let a preference for a “humane” label become an excuse to leave an animal unchecked. Compare safe categories and settings in best mouse traps for homes after you have identified the route.

Overhead educational placement map showing protected trap stations along kitchen, pantry, plumbing, and garage travel edges.
Illustrative placement map: use evidence along protected edges to choose a route; do not place traps randomly in open floor space.

How to get rid of mice in walls without cutting holes: Start from the accessible evidence, not from demolition. Traps belong at the likely entry or travel edges outside the wall—under sinks, along baseboards, behind appliances, near utility penetrations, in the attic or crawl-space only when access is safe, and near door or foundation gaps. Listen and document which room, wall section, and time of day the sound repeats. Avoid sealing every possible exit while you still hear active activity inside a void; you may need a controlled trapping period and a professional inspection to identify the actual route. Do not block required vents, combustion-air openings, drainage paths, or electrical access.

Check traps according to their instructions and dispose of any catch using a safe, contained method. The mouse traps and baits hub explains placement and access-safety tradeoffs in more detail. Do not treat trap activity as a reason to skip cleaning and exclusion; it is evidence that the route needs follow-through.

Step 4: Safely wet-clean droppings and nesting sites

Do not dry-sweep or vacuum rodent droppings, urine, nests, or dead rodents. CDC guidance directs people to wet rodent waste with a disinfectant or a fresh bleach solution, allow the recommended contact time, wipe the material up with paper towels, contain the waste, and wash hands after removing gloves. The wet step matters because dry disturbance can move contaminated dust into the air.

For a normal, accessible household cleanup, start by ventilating the space if it is safe to do so. Put on rubber or plastic gloves. Spray the droppings and nearby surface until wet, using either a household disinfectant as directed on its label or the CDC bleach-solution method on a compatible surface. CDC specifies allowing the bleach solution to soak for five minutes; for a commercial disinfectant, use the label’s contact time. Wipe with disposable towels, place waste in a covered garbage container that is emptied regularly, clean the hard surface again, and wash gloved hands before removing gloves when possible. Then wash bare hands with soap and water.

Use the detailed cleanup safety hub for cabinets, garages, textiles, dead rodents, and nests. The relevant health message is not “panic over any one dropping.” It is to avoid exposure to rodent urine, droppings, saliva, and nesting materials, and to clean them using a method that does not create more airborne dust. Read CDC Hantavirus prevention guidance for the public-health context and when to speak to a healthcare professional after a concerning rodent exposure or illness.

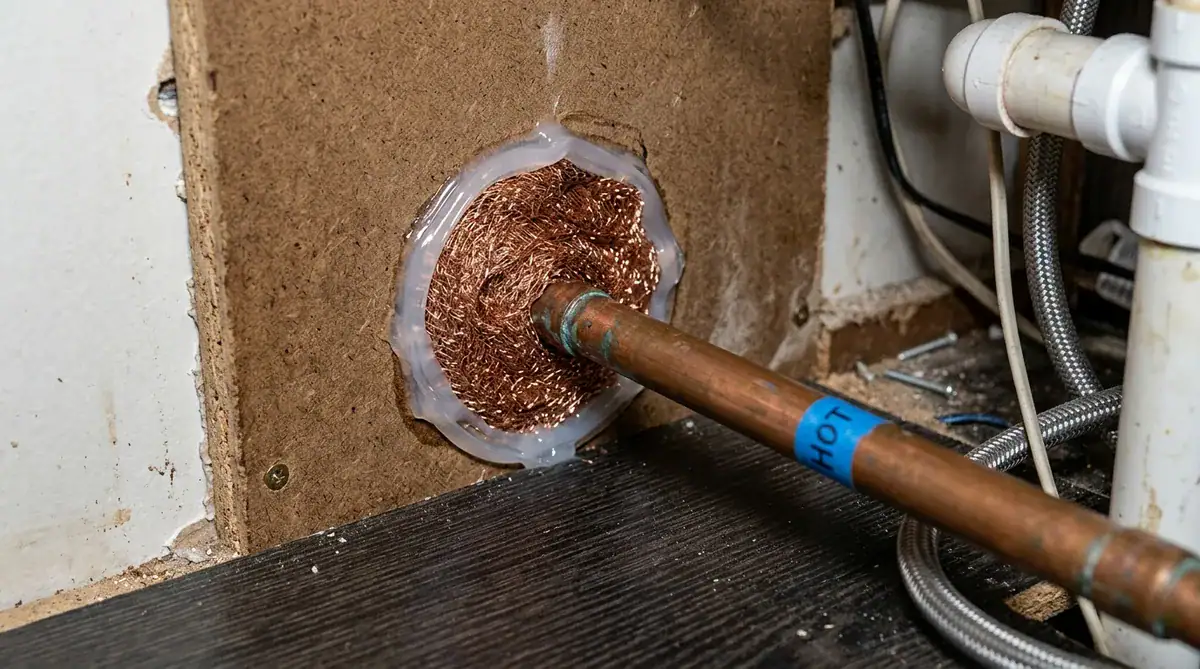
Step 5: Seal exterior and interior entry points with copper mesh

Exclusion is what turns a successful catch into a durable solution. Inspect the routes you documented in Step 1: pipe penetrations, foundation transitions, garage-door corners, door bottoms, siding changes, vent surrounds, roofline gaps, damaged screens, and gaps behind cabinets. CDC and UC IPM both emphasize closing small openings and using durable materials suitable for the repair. For larger or structurally significant gaps, the repair may require hardware cloth, metal flashing, metal sheeting, cement, or a contractor’s work rather than a consumer sealant.

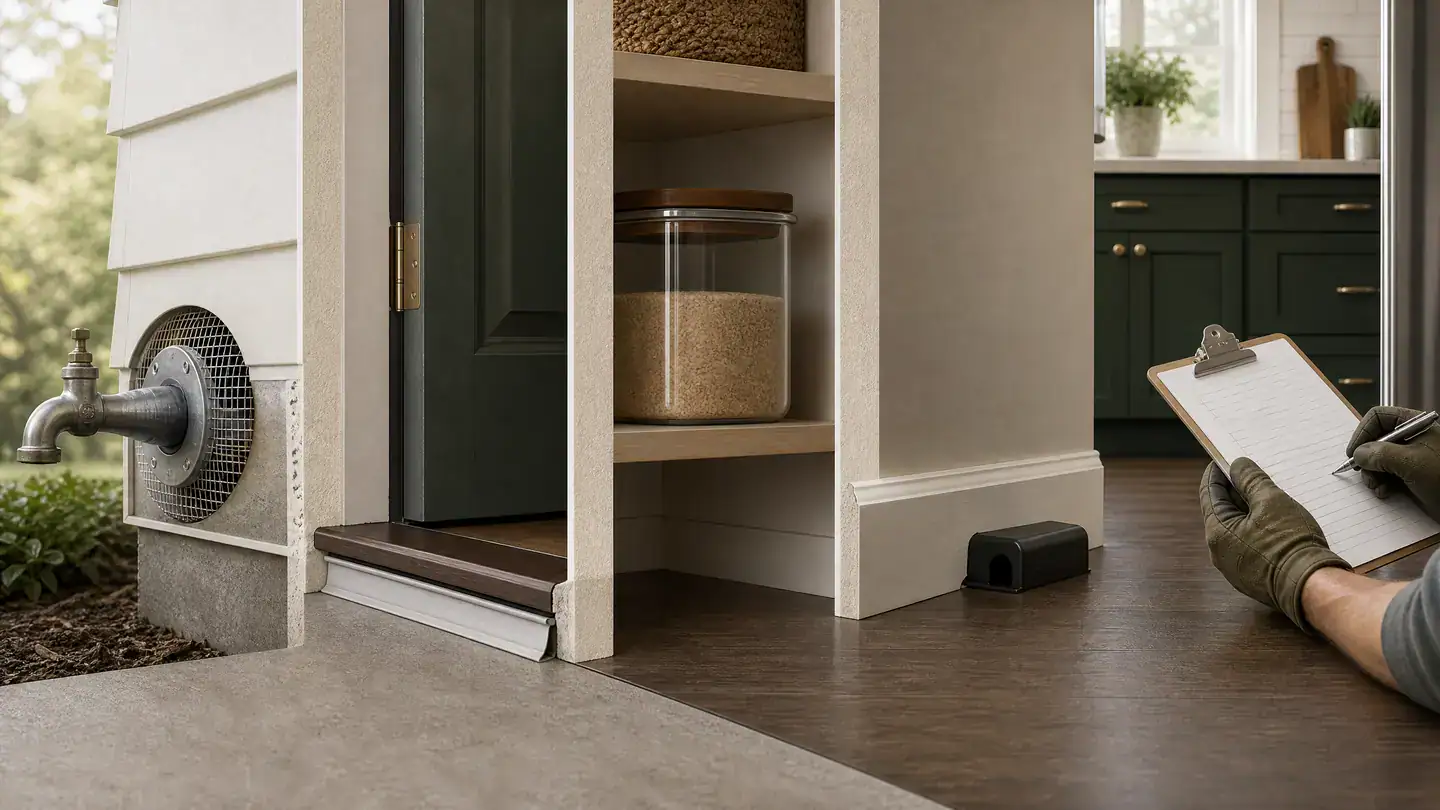
Illustrated prevention sequence showing a sealed exterior penetration, weather-stripped door, sealed pantry storage, protected trap, and monitoring checklist.
Durable prevention is a sequence: reduce access, control active routes, repair real gaps, and verify that new signs stop.

Foam by itself is not a reliable mouse barrier where rodents can gnaw. Likewise, do not pack a material into a vent, drain, fireplace, combustion-air opening, or service area just because it looks like a gap. The repair must preserve the building system’s intended function. If you cannot identify what an opening serves, stop and get qualified advice before blocking it.

Time this step intelligently. You do not need to wait indefinitely to repair obvious exterior defects, but you also do not want to close a route in a way that leaves active mice trapped in a wall or attic. Use the evidence from traps and monitoring to prioritize. The mouse-proofing hub and the material comparison guide for steel wool versus copper mesh can help you match an accessible gap to an appropriate repair method.

Step 6: Monitor runways until all activity ceases

Cleaning a room once does not prove mice are gone. A better test is whether the same evidence points stay quiet after food control, traps, and repairs. Recheck the places you documented: the cabinet edge, pantry shelf, under-sink gap, garage wall, or attic access. Look for new droppings, new gnawing, fresh nesting material, food damage, recurring sounds, or trap activity. Keep a simple note of the date, room, what you found, and what you changed.

How can you tell if mice are gone? You cannot prove an entire building is mouse-free from one silent night. You can build confidence when the strongest activity points remain free of new signs over a sustained monitoring period, traps stay inactive after the initial control period, food and packaging stop being damaged, and the likely entry gaps have been repaired. The existing site standard of two quiet weeks is a practical checkpoint for ordinary accessible situations—not a guarantee for every house, wall void, or shared building.

If evidence returns, treat it as information. A returning pattern may mean the trap was not on the real route, competing food remains, a gap was missed, the building has multiple access points, or the activity is in an inaccessible area. Do not keep adding random products. Revisit the route map and decide whether the scope now calls for professional inspection.

Step 7: Escalate to certified professionals when needed

Calling a professional is not failure. It is the safer choice when droppings are widespread, contamination affects insulation or HVAC systems, activity is in inaccessible walls or roofs, there is a persistent dead-rodent odor, wiring is damaged, a shared building may be involved, or you cannot place traps and make repairs safely. It is also sensible when activity continues after you have completed a focused cycle of sanitation, protected trapping, cleanup, and exclusion.

Ask a prospective provider what the inspection includes, which entry points they identified, how they will protect children and pets, whether cleanup or exclusion is included, what monitoring is planned, and what is not included. A quote is more useful when it describes the scope instead of promising a generic result. If rodenticides are discussed, ask about the exact label, secured-station placement, access controls, and possible hidden-carcass or non-target risks. Read EPA rodenticide safety information and follow every product label; a website cannot override a label.

Decision illustration contrasting a focused accessible home inspection with a professional attic-access assessment.
Choose by evidence, safe access, monitoring capacity, scope, and safety—not by an internet promise or a generic price.
DIY versus professional help: choose by scope, not a promised price
Decision factor Focused DIY may fit when Professional assessment is often the better fit when
Evidence Activity is light, visible, and concentrated in accessible areas. Droppings or damage appear across multiple rooms, voids, or systems.
Access You can safely inspect, place protected traps, clean, and make an appropriate repair. The route involves roofs, walls, attics, HVAC, damaged wiring, or unsafe ladder work.
Cost control You can buy only the tools and materials that match a documented problem, with no promise that a single purchase resolves it. You need a written scope that combines inspection, treatment, exclusion, cleanup, and follow-up; compare local written estimates rather than relying on generic internet prices.
Time and monitoring You can check traps and evidence points consistently and make follow-up repairs. You cannot monitor frequently, activity continues, or the building’s management responsibility is unclear.
Health and safety Cleanup is small, accessible, and can follow CDC guidance without disturbing heavy contamination. Contamination is heavy, occupants have heightened concerns, or the condition requires specialized PPE or remediation practices.

How to get rid of mice naturally without poison: realistic limits

“Natural” can mean several different things. If it means using no rodenticide, a responsible plan can emphasize sanitation, protected trapping, safe cleanup, durable exclusion, and monitoring. Those are the durable parts of low-toxicity control because they remove food access, reduce shelter, address current activity, and block re-entry.

If it means relying on peppermint oil, scent pouches, ultrasonic devices, or baking soda as the primary method, the answer is different. These approaches do not close gaps, remove nests, clean contamination, or reliably control an established route. UC IPM states that high-frequency electronic devices are not effective for house-mouse control, and it describes exclusion and trapping as central management tools. Do not use baking soda mixtures as an improvised killing method, and do not use essential oils in a way that creates an exposure risk for children, pets, or people with sensitivities. The relevant question is not whether a smell is unpleasant to a mouse; it is whether the plan removes access and verifies that the evidence stops.

For a non-poison approach, focus first on the actions that change the home: containers with lids, clutter reduction, protected traps on confirmed routes, wet cleanup, and durable repairs. The site’s natural mouse removal guide adds a low-toxicity decision path without presenting scent products as a substitute for the core sequence.

Choose the next action by your situation

Situation-based mouse control choices
Situation Primary action Key safety constraint Best next guide
Kitchen or pantry activity Protect food, document the cabinet-edge route, use protected traps, and inspect plumbing gaps. Keep traps and cleaners inaccessible to children and pets; discard food that may be contaminated. Cleanup safety
Garage, shed, or storage area Ventilate if safe, wet-clean evidence, move feed and seed into sealed containers, and inspect door corners. Do not dry-disturb dusty contamination or drag contaminated cardboard indoors. Garage mouse removal
Apartment or shared building Document activity, protect food, use safe in-unit controls, and notify management about building gaps or shared routes. Do not modify common systems or use unapproved bait in shared areas. Apartment guide
Car, truck, camper, or engine compartment Air out and inspect before cleaning; wet-clean waste and inspect air intake areas before starting an idle vehicle. Disconnect the battery before inspecting the engine compartment and consult a qualified mechanic for damage or unsafe access. Mice in a car
Attic insulation, walls, or HVAC Document the location and assess whether safe access exists before acting. Do not disturb heavy contamination, insulation, ducts, or required ventilation without an appropriate plan. Attic insulation guide

Make a simple mouse-activity map before you buy more products

A small written map turns a stressful problem into a sequence you can check. Use a note on your phone or a sheet of paper. Draw only the rooms where evidence exists. Mark the date, evidence type, and exact location: “two droppings behind refrigerator,” “gnawed pet-food bag in garage,” “scratching on north bedroom wall after 10 p.m.,” or “gap around hot-water pipe under sink.” Add a second mark for any trap and a third for a repaired opening. You do not need a perfect floor plan; you need a record that lets you compare before and after.

Start with the kitchen, pantry, utility room, garage, attic access, and exterior door thresholds because those areas often combine food, warmth, storage, plumbing, or gaps. In a kitchen, pull out an appliance only if it can be done safely and check the wall edge behind it. In a pantry, check the back corners, low shelves, and packaging rather than just the floor. Under a sink, distinguish the cabinet itself from the pipe opening behind it. In a garage, inspect door corners, weather stripping, feed or seed storage, shelving, and stored cardboard. Outside, note openings around utility lines, doors, vents, siding, and the foundation rather than sealing every seam indiscriminately.

This map improves trap placement because it identifies the path, not just the room. It also improves communication when you need help: a landlord, building manager, mechanic, contractor, or pest professional can act faster when you can describe the exact evidence point and what has already been tried. Most importantly, it prevents the common loop of cleaning one area, seeing new signs elsewhere, and assuming the first step failed. New evidence may reveal a second route. Treat it as information, update the map, and match the next action to the new finding.

After the initial control period, use the same map for monitoring. A repaired pipe gap with no new signs is useful evidence. A pantry route that stays active despite untouched traps may mean the traps are not on the actual travel edge or that food remains accessible. An attic sound that continues after a kitchen cleanup is a different problem area, not proof that cleanup caused a failure. This method keeps the plan focused, makes expensive or risky actions easier to justify, and gives you a clearer threshold for professional escalation.

Common mistakes that make mouse removal fail

  • Starting with a purchase instead of evidence. One trap, scent product, or filler material will not tell you where the active route is.
  • Sweeping or vacuuming droppings while dry. Wet and contain rodent waste first using CDC-aligned cleaning guidance.
  • Placing one trap in open space. Put devices on a confirmed protected runway, not in the middle of the room.
  • Sealing blindly. Do not block vents, drains, required air openings, or unknown utility routes; do not create a wall-void problem by closing an active route without a plan.
  • Leaving competing food available. Mice should not have easy access to pet food, snacks, spilled grain, cardboard-packaged food, or open trash while you are trying to control the route.
  • Using poison casually indoors. Rodenticides carry access, non-target, and hidden-carcass considerations. If they are used, the label and secured placement govern the decision.
  • Declaring success after one quiet night. Monitor the same evidence points until new signs stop over a sustained period.

What kills mice instantly?

There is no safe, responsible one-line answer that fits every home. Products marketed as instant fixes can create new risks when they are used around children, pets, food areas, or inaccessible spaces. For a small, accessible house-mouse problem, protected traps placed on the active route are usually more controllable than an indoor poison program because you can inspect the outcome and remove the animal safely. Rodenticides are not an “instant” household shortcut; they are toxic products that must be used exactly as labeled and may create hidden-carcass or non-target concerns. If you need rapid control because activity is widespread, inaccessible, or safety-sensitive, call a qualified professional for an inspection rather than escalating an improvised method.

When to stop DIY and call a professional

Seek professional help when you see widespread droppings, contaminated attic insulation, evidence in heating and cooling ducts, inaccessible wall or roof activity, persistent odor, significant wiring damage, repeated activity after a focused DIY sequence, or a situation you cannot manage without unsafe access. CDC guidance specifically advises additional precautions for heavy infestations and recommends professional services for rodent access to heating and cooling systems. A health professional is the right contact if a recent illness may be connected to rodent exposure; tell them about the exposure and do not rely on an online article to diagnose symptoms.

If you want a guided way to organize your observations before choosing a next step, the AI mouse elimination plan is currently hosted on the Mice Gone Guide diagnostic subdomain. It should be used as an educational planning aid, not as a substitute for an in-person inspection or professional medical advice.

Frequently asked questions

What is the fastest reliable way to get rid of mice in a house?

Use a sequence: confirm the active route, remove food access, place several protected traps along that route, clean rodent waste with a wet method, repair entry points, and monitor for new signs. The fastest responsible plan is the one matched to the evidence, not the one with the biggest product claim.

How do I tell if mice are gone?

Confidence increases when the strongest activity points stay free of new droppings, food damage, sounds, nesting material, and trap activity over a sustained monitoring period, while the likely entry points have been repaired. One quiet night is not proof.

Can I vacuum mouse droppings?

Do not vacuum or sweep rodent droppings while dry. CDC directs people to wet the material with a disinfectant or bleach solution, allow the recommended contact time, and wipe it up with disposable towels before cleaning the surface.

How do I get rid of mice in an apartment?

Document the evidence, protect food, use safe in-unit controls where permitted, and notify the landlord or property manager about gaps, utility routes, shared walls, or common-area evidence. Avoid altering building systems or using bait in shared areas without authorization.

Do peppermint oil, baking soda, or ultrasonic devices get rid of mice?

They do not replace sanitation, trapping, cleanup, exclusion, and monitoring. UC IPM reports that ultrasonic and related devices have little evidence as control for established mice. Do not rely on improvised baking soda mixtures as a killing method.

When should I call an exterminator for mice?

Call a qualified professional when activity is widespread, inaccessible, repeated after correct DIY steps, associated with insulation, ducts, roofs, wall voids, wiring damage, or substantial contamination, or when you cannot complete the work safely.

Sources and editorial standard

This guide is general education for ordinary household decisions. It is reviewed against public-health and integrated-pest-management guidance and does not override product labels, local rules, building requirements, or professional advice for a high-risk situation.

Editorial review: Reviewed 18 August 2026. Update this page when CDC cleanup guidance, relevant pesticide labels, or major extension recommendations change.


Mice Gone Guide

Get smarter mouse-control emails

Practical mouse prevention, safe cleanup, and product recommendations that help you act faster with less guesswork.

No spam. Just actionable guidance for keeping mice out and cleaning up safely.